

18 Supercool Science Experiments with Ice
- July 25, 2020
- Science Experiments
Today, we are going to investigate something which is most familiar with our children i.e. ‘ICE’.
Ice can reveal many fundamentals of scientific principles through some simple and easy science experiments.
The main purpose of investigating these ice science activities is to explore the properties of solid, liquid, and gas at a time since ice can be altered to any form which makes learning properties of ice easy and hands-on.
Ice Science Experiments
So, hurry up to grab a tray of ice and chill out with our best collection of ice activities.
1. Glow in the Dark Ice Cubes Science Activity
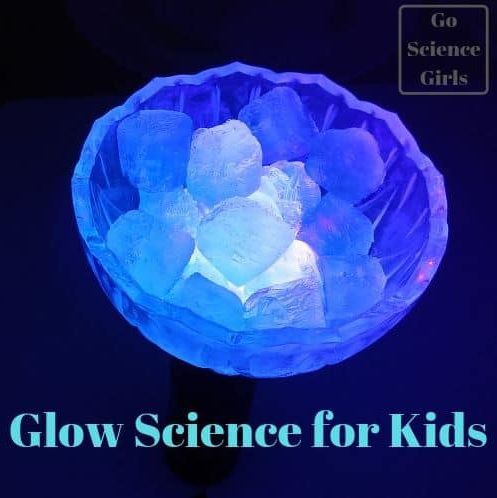
Spice up your Halloween parties or events with simple and amazing science activity at your home!!
Glow the ice cubes in a bowl like a magic trick and amaze your family and friends!
The speciality of this science activity is sensory and edible science activity. Hurry up to light up your party night. Click here to get the details: Glow in the Dark Ice Cubes Science Activity
2. Lego Ice Excavation Science Experiment
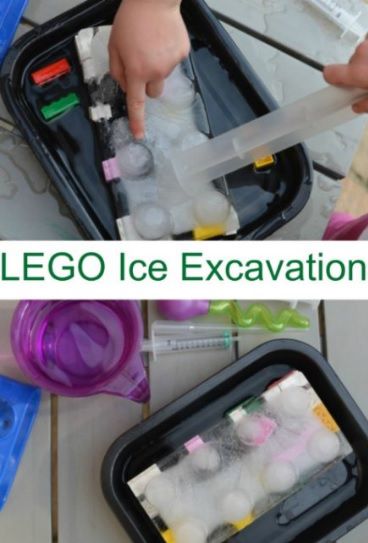
Here is another easy, fun, and messy free science activity that will definitely bring a serious WOW expression on your kid’s face.
A great opportunity to learn about capacity and volumes for the kids while having great fun too.
Click on Lego Ice Excavation Science Experiment to know how to set up an ice excavation.
3. Instant Ice: Winter Science Experiment for Kids
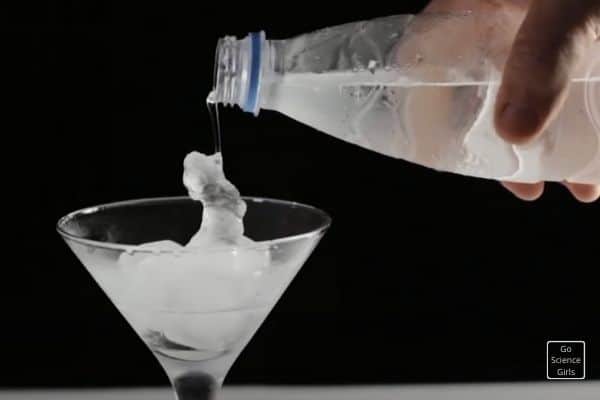
Creating instant ice is more like a magic and fascinating for kids.
Even preschoolers enjoy watching magical outcome of the experiment!
Get the more details of this super cool experiment here Instant Ice: Winter Science Experiment for Kids.
4. Overflowing Ice Cube Experiment
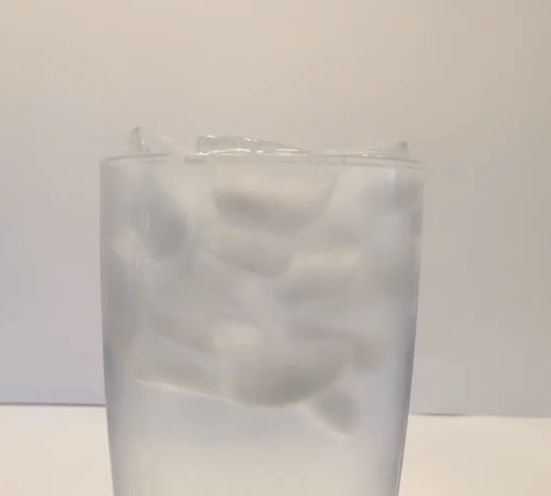
Enjoy awesome hands-on science project that help kids learn about what really happens when an ice cube is added to a glass full of water.
Kids are able to watch and observe the intriguing results. Best demonstration to learn about density of water in hands-on way!
Does the water overflow or remain same when an ice cube is added to a glass full of water? Find out here Overflowing Ice Cube Experiment
5. Don’t Melt the Ice! Science Experiment for Kids
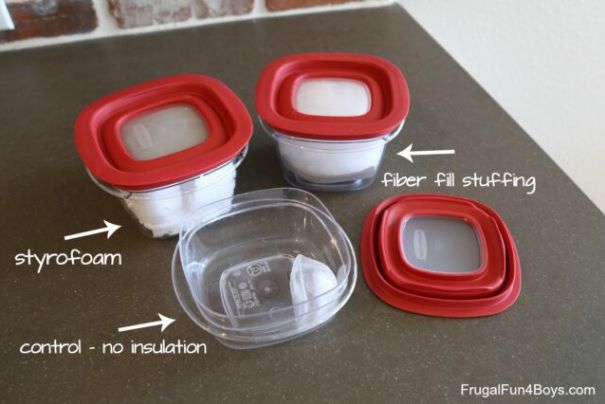
Keeping an ice cube from melting let kids learn about states of matter, heat properties, and which type of materials conduct good heat.
Kids feel more excited about how long they can keep an ice cube from melting with just some supplies around the home.
Click on Don’t Melt the Ice! Science Experiment for Kids
6. Ice Melt Faster Science Experiment
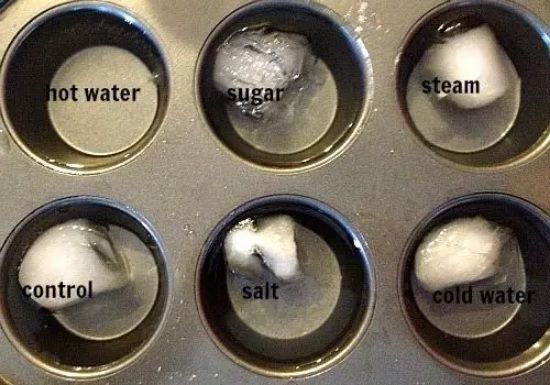
Looking for a great science fair project using ice!? Here is a spectacular science activity that works great as a science fair project allowing kids of 5-7 grades to present and explain their findings to the audience.
Want to know in which variable the ice cube melts faster? Click on Ice Melt Faster Science Experiment
7. Sticky Ice Science Experiment
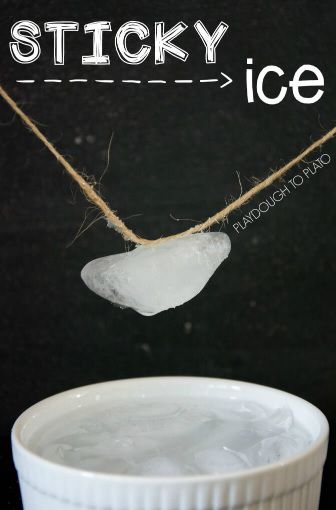
Little magical experiment for 3-8 grades children challenging to lift an ice cube using only two ingredients!
Kids can challenge their friends to get the ice out of the bowl without getting their hands wet. Keeps children engaged and entertaining for hours!
Find the instructions step-by-step here: Sticky Ice Science Experiment
8. Fizzy Ice Sensory and Science Experiment
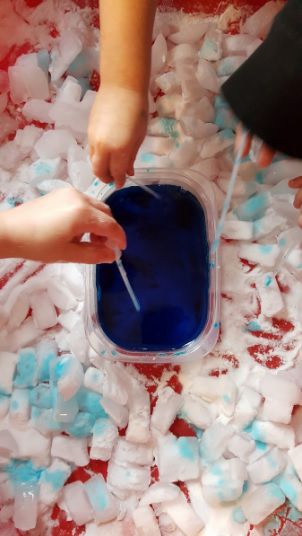
Spectacular science activity, easy to do with simple household items offers a great visual demonstration for pre-schoolers and older children about the physical properties of ice and water.
Enjoy the fizzy ice science experiment by manipulating the ice and water through hands-on.
What makes an ice cube fizzy and what is that magical trick behind it? Let us learn here: Fizzy Ice Sensory and Science Experiment
9. Make Ice Grow Science Experiment
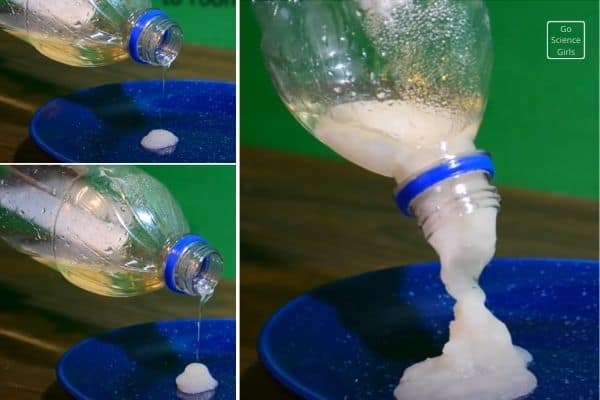
Learning is a process of investigations and explorations! Children participating in this simple activity demonstrates this process of learning hands-on.
Click on Make Ice Grow Science Experiment
10. Painting on Ice Science Experiment
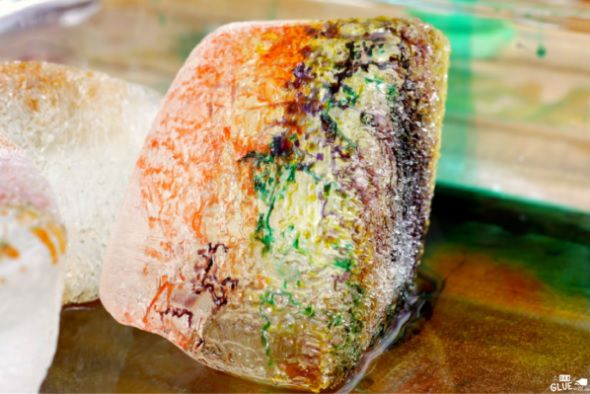
Make your kids super creative making their painting activities super fun and creative with this super cool science activity!
An awesome fun craft idea, a great indoor activity, and a fantastic sensory activity that is perfect for toddlers and pre-schoolers.
Want to know more about this creative art activity!? Read on: Painting on Ice Science Experiment
11. Spider Ice Melt Science Activity for Kids
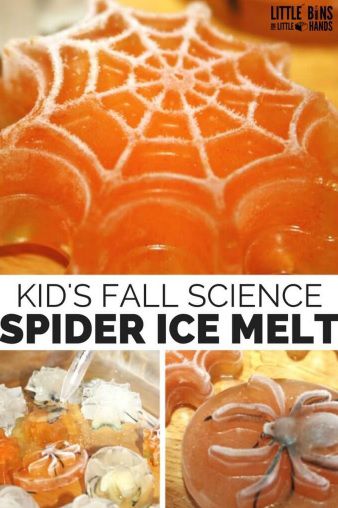
If you are searching for a fun Halloween Science activity that will cool your bore-domed children, you have to try this awesome spider ice melt science experiment.
You can set up this activity in just few minutes with an easy spider theme along with a playful Halloween fun twist.
Spider Ice Melt Science Activit y for Kids
12. Frozen Baking Soda Ice Cubes Science Experiment
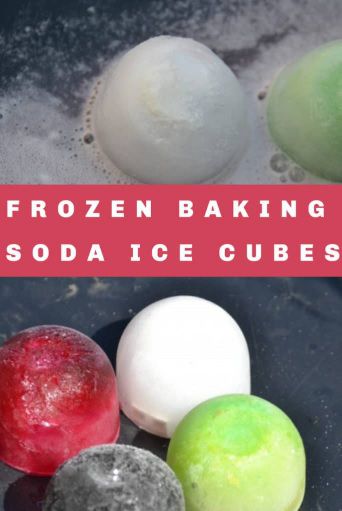
Frozen baking soda ice cubes are fun and brilliant idea to learn about the basic properties and its reaction of baking soda.
Hands-on experiment, easy to do, and messy free. Kid-friendly science activity perfect for a hot summer day!
Click on Frozen Baking Soda Ice Cubes Science Experiment to learn more.
13. Freezing and Melting Objects in Ice Science Experiment
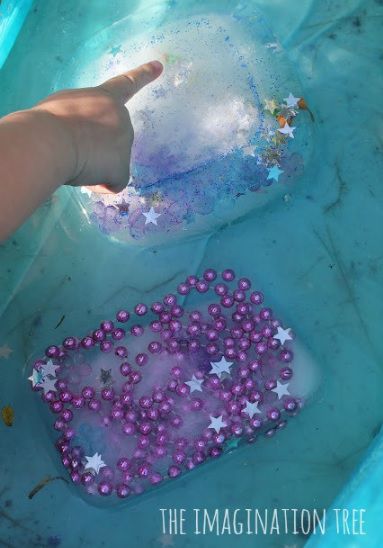
Freezing and melting of ice happens at certain temperature changes and how long an ice can hold an object from freezing and melting!?
A great visual demonstration for the kids of all ages to learn about temperature changes and its impact on ice.
Start off with this wonderful experiment by learning the simple instructions step-by-step: Freezing and Melting Objects in Ice Science Experiment
14. Ice Water Vapor Science Experiment
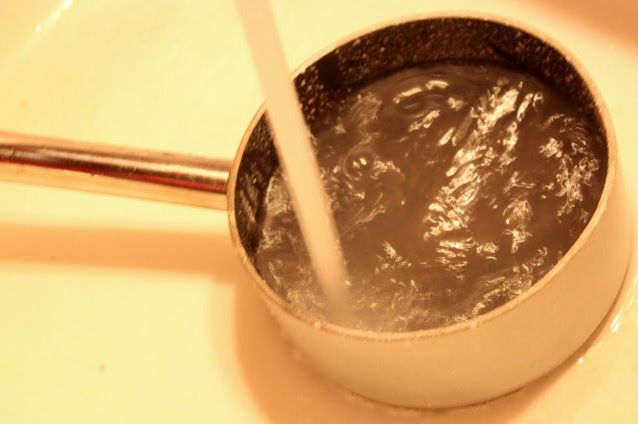
Here is an excellent visual activity that demonstrates the basic principles of water vapour, water, and ice.
Get the more details about the experiment here: Ice Water Vapor Science Experiment
15. Hot Ice Science Experiment
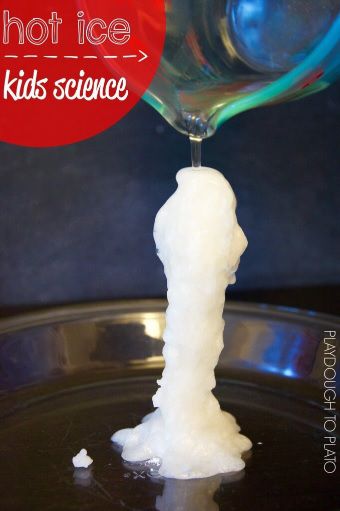
Introduce kids to the idea of critical thinking and making predictions i.e. thoughtful guesswork about the end result of the experiment.
Amaze your kids with the magical tower built up using 2-3 ingredients in your own kitchen. Wonderful pre-school science experiment to watch and understand the simple science behind the outcome.
Check out the instructions here Hot Ice Science Experiment
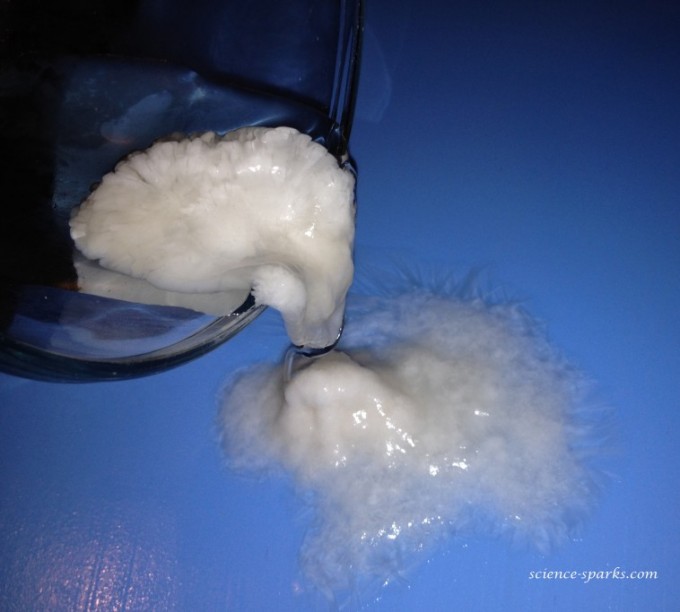
16. Grow Your Own Ice Spikes Science Experiment
Great activity to grow ice crystals. Add some food color to make it interesting.
Read the complete instructions here: Grow Your Own Ice Spikes Science Experiment
17. Ice Cream in a Bag Science Experiment
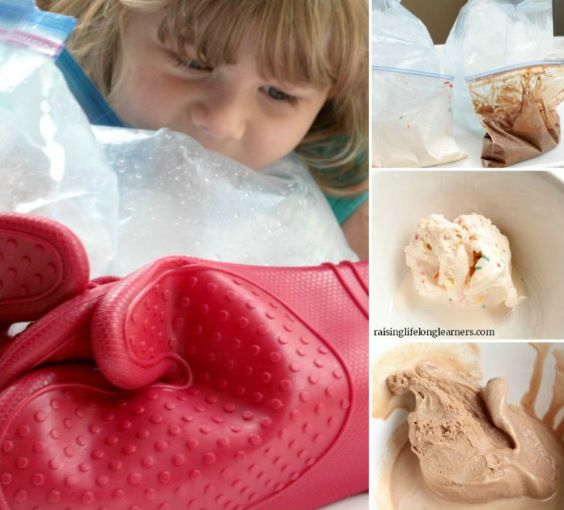
Delicious science activity that you can do all year along whenever you wish. Great demonstration to learn about exothermic chemical reactions .
Want to know how this simple science activity works: Click on Ice Cream in a Bag Science Experiment
18. Rainbow Melting Ice Science Experiment
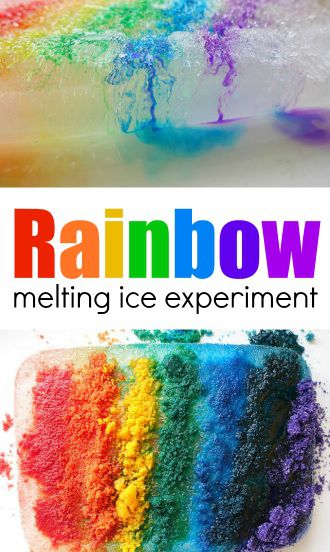
Rainbows are colorful and are great for playful pre-school theme!
Turn your kids boring playtime into a beautiful art science activity using vibrant and attractive colors. Kids will really enjoy this super cool activity.
Get the instructions: Rainbow Melting Ice Science Experiment
Cool the hot summer with these creative and unique science experiments in educational and fun way! All the experiments are simple, classic and the outcome is magic like! Give it a try and have a blast with these super fun science activities.
Leave a Reply Cancel Reply
Your email address will not be published. Required fields are marked *
Name *
Email *
Add Comment *
Save my name, email, and website in this browser for the next time I comment.
Post Comment
- Skip to primary navigation
- Skip to main content
- Skip to primary sidebar

- FREE Experiments
- Kitchen Science
- Climate Change
- Egg Experiments
- Fairy Tale Science
- Edible Science
- Human Health
- Inspirational Women
- Forces and Motion
- Science Fair Projects
- STEM Challenges
- Science Sparks Books
- Contact Science Sparks
- Science Resources for Home and School
Easy Ice Experiments for Kids
September 11, 2018 By Emma Vanstone Leave a Comment
Ice experiments are always fun, easy to set up, and often mess-free! These investigations are great for cooling down in summer, and if it’s cold enough in winter, you could try leaving water in a mould or tray outside overnight to see if it freezes without a freezer.
Don’t forget I have lots of FREE printable science experiments you might also like!
Ice Experiments for Kids
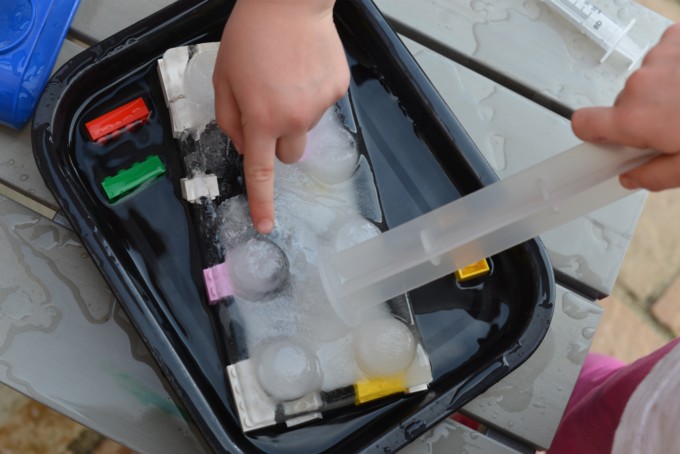
Easy ice excavations.
First up is this easy LEGO ice excavation . How could you speed up the melting of the ice? Try dropping warm and cold water over the ice with a dropper, pipette or spoon. Older children can try adding a little salt.
Another idea is to experiment with either lots of small excavations or even a giant one!
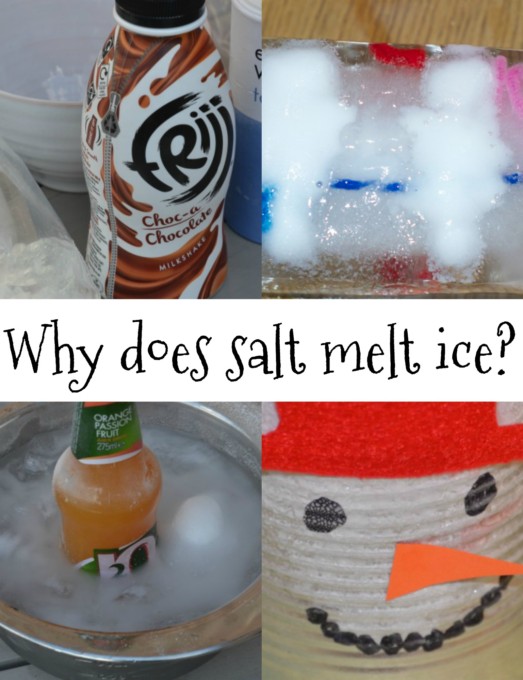
Why does salt melt ice faster?
Do you know what happens when you put salt onto ice ? Find out with these easy investigations, including making ice cream from milk and frost appear on the outside of a tin can!
Adding salt to an ice cube also allows you to lift an ice cube with a piece of string !
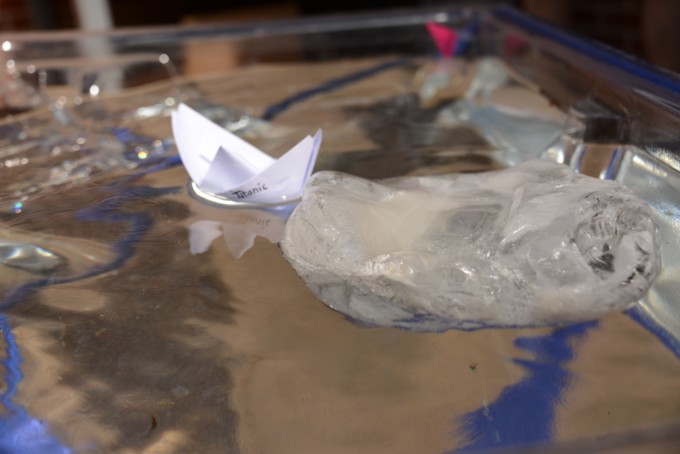
Why did the titanic sink?
Discover one of the reasons the Titanic hit an iceberg by making your own icebergs.
Creative ice experiments
The Artful Parent has a beautiful melting ice, salt and watercolour experiment .
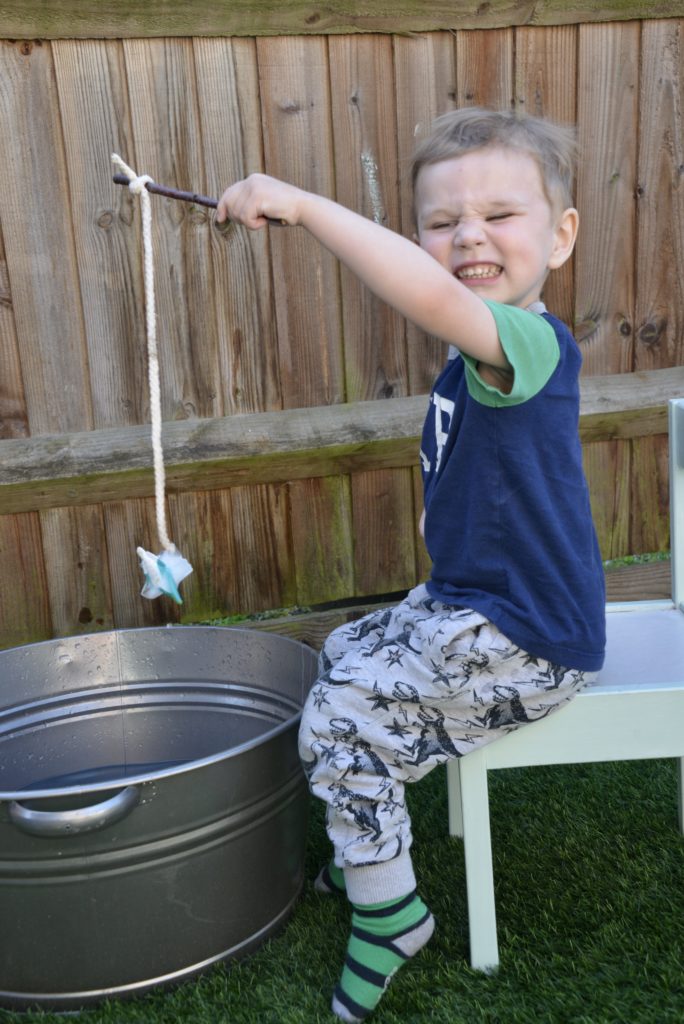
Freeze small plastic fish inside an ice cube and try some ice fishing ! This is a lovely preschool science activity where children discover how water temperature impacts how fast the ice melts.
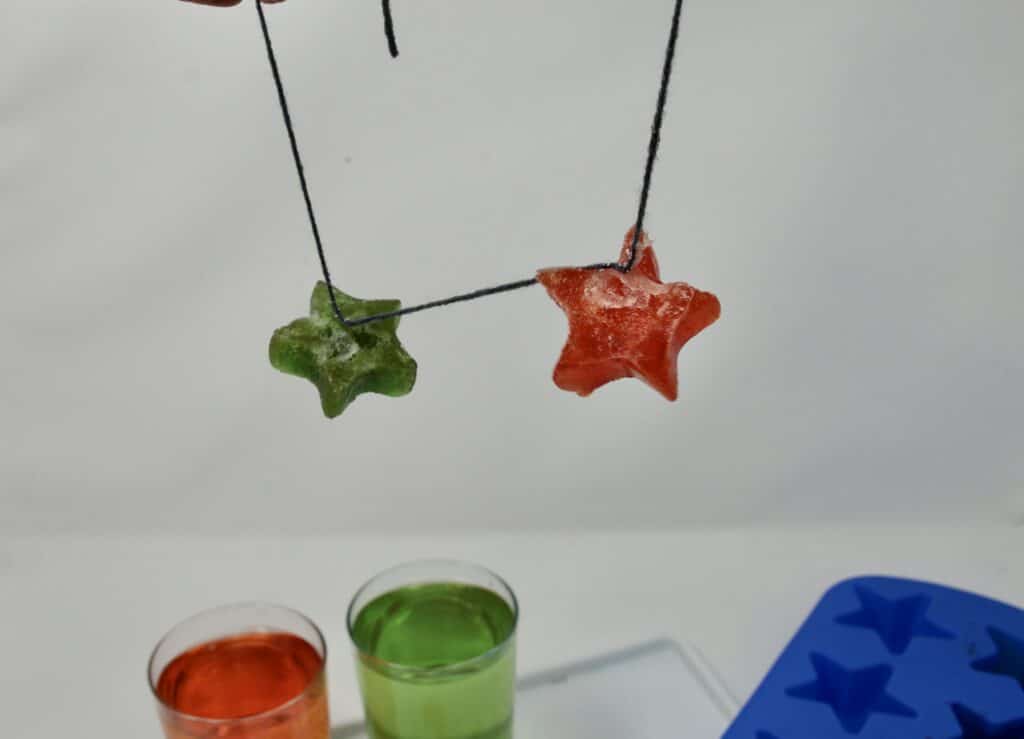
Make some pretty ice decorations . Is it cold enough for them to freeze overnight?
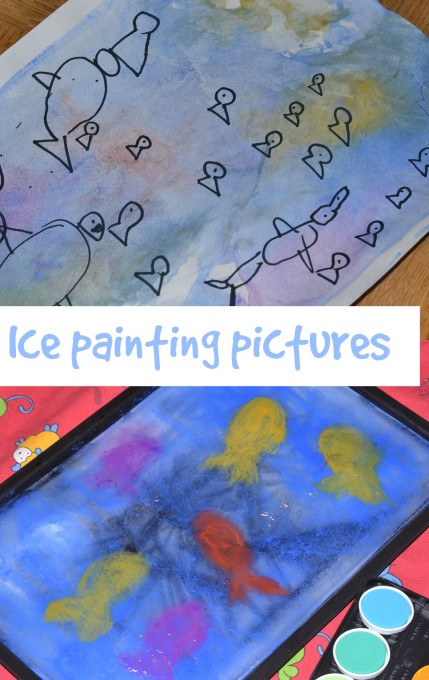
Try some ice painting ; this is great fun for even very young children, as once the ice starts to melt, paintbrushes glide over the surface easily. Once you’ve finished painting, wipe the surface and paint again.
We love these frozen Elsa hands from Happy Hooligans.
Ice Experiments in the kitchen
Making ice cream in a bag is another excellent demonstration of the effect of salt on ice .
Make slushy drinks from fruit juice frozen into ice cubes.

Make hot ice – a science illusion
Did you know you can make hot ice ?
Finally, test your hockey skills with this mini ice hockey rink .
Can you think of any more ice experiment ideas for us?
More science experiments for kids
Find out why ice feels sticky to the touch .
Try one of my winter science experiments and STEM Challenges.
Little ones will love these sensory snow recipes too!
Last Updated on February 23, 2023 by Emma Vanstone
Safety Notice
Science Sparks ( Wild Sparks Enterprises Ltd ) are not liable for the actions of activity of any person who uses the information in this resource or in any of the suggested further resources. Science Sparks assume no liability with regard to injuries or damage to property that may occur as a result of using the information and carrying out the practical activities contained in this resource or in any of the suggested further resources.
These activities are designed to be carried out by children working with a parent, guardian or other appropriate adult. The adult involved is fully responsible for ensuring that the activities are carried out safely.
Reader Interactions
Leave a reply cancel reply.
Your email address will not be published. Required fields are marked *

Instant Ice Science Experiment for Kids
Sharing is caring!
- Facebook 210
- Pinterest 82
This easy instant ice science experiment requires very few supplies but has a big impact. All you’ll have to do is pour liquid water and watch it magically turn into ice before your eyes!
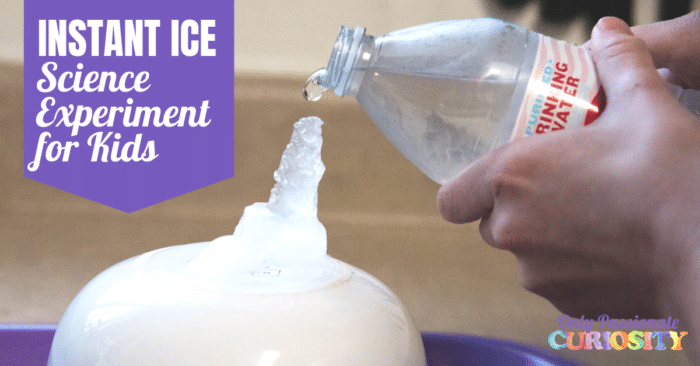
See the Instant Ice Science Experiment in Action
- Bottled water
- Glass or ceramic bowl
- Plastic tray or shallow metal cookie sheet
- Curious kids
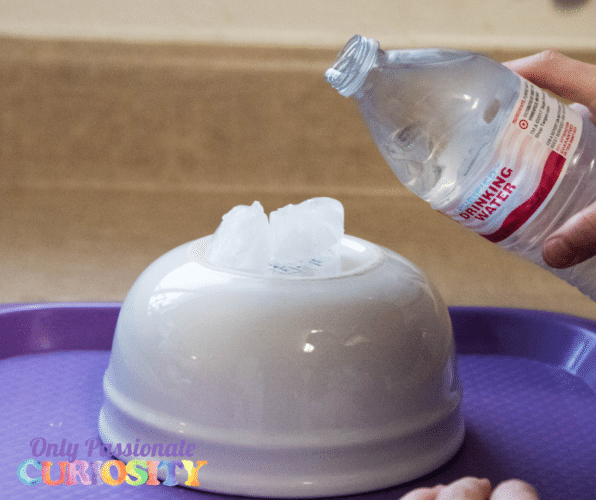
- Put water bottles in the freezer for two hours. (You might want to set a timer to remind you to get them out!) Lay them on their sides for the best results, but try not to dent them.
- Remove the water bottles from the freezer before they freeze. (You’ll know they’re ready when crystals form when you jostle the bottles.)
- Place a ceramic bowl upside down on a flat surface (like a tray) to catch the water overage.
- Place an ice cube on top of the pouring surface.
- Then SLOWLY pour while instant ice forms!
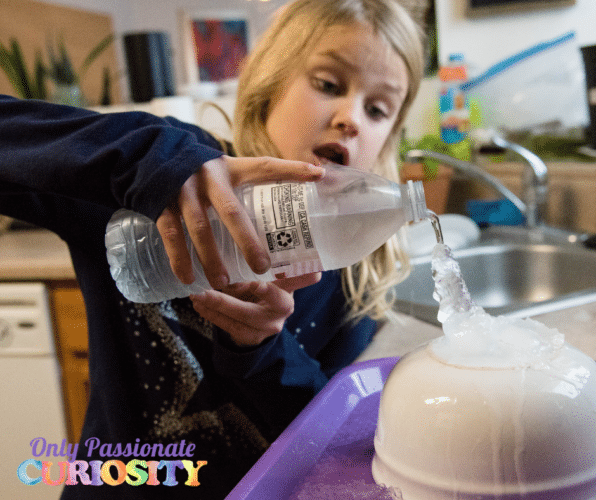
How the Instant Ice Science Experiment Works
This simple but amazing instant ice science experiment is more than just a cool one (see what I did there?). The science behind this experiment lies in the freezing temperature of water and how ice crystals form. This experiment is sometimes referred to as Supercooled Water or Flash Freezing. When the freezing temperature is reached, the water molecules freeze by forming ice crystals.
Why did we put an ice cube on top of the bowl? Because it’s easier for the water molecules to turn to ice on top of already-formed ice crystals. As the ice crystals build on existing ice crystals, they eventually freeze the entire bottle of water.
The process of starting the ice crystals is called “nucleation.” Nucleation starts from an impurity or scratch or piece of dust on the container holding the water. In this case, the nucleation is the water bottle. One ice crystal attaches to the imperfection, and the others grow on top. Isn’t science cool?!
Check for Understanding
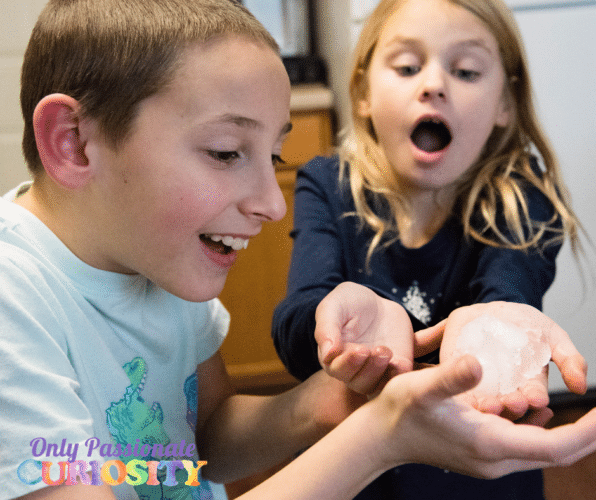
Explore this concept further by asking your kids these questions and experimenting:
- Would the experiment work the same if the water had food coloring added to the water?
- Would the results be the same if you started the experiment with hot water in the bottles before you put them in the freezer?
- Does the temperature in the room change the results?
- How high of an ice tower can you pour before it breaks?
Additional Resources
Want to dive deeper into this topic? Check out these fun resources!
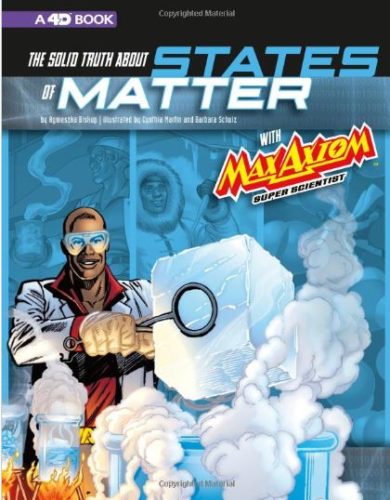
The Solid Truth about States of Matter –This graphic novel with colorful pictures throughout will help your students learn basic science truths in a fun format!
Rookie Read About Science : Solids, Liquids, and Gases– This 5″ x 7″ book uses three examples and lot of colorful photos to illustrate the different states of matter. The text is simple and direct and perfect for young students.

Many Kinds of Matter –This jewel of a science book is just the right of information for teaching this topic. Colorful photos and understandable text make this one my favorites!
Why does water expand when it freezes-Naked Science: This fun format uses high-speed drawings and simple text to get the point across. I dare you to try to stop watching!
Brain Stuff–How Can Hot Water Freeze Faster Than Cold Water–All of Brain Stuff’s videos are so well done. You can tell they’re big budget and are pros at this YouTube platform! Enjoy!
Do you love science experiments as much as we do? Then be sure to check out this experiment with salt and ice.


Similar Posts
Easy & Cute Elephant Craft for Kids

Learning on the Farm {Nature Study}
Great Gloves and Marvelous Mittens: A STEM Challenge
The nature connection- identifying our tree.
Felt Pumpkin Craft

Let’s Play Christmas Tree I Spy
One comment.
It is so cool ? Tried it with my older sister it was very fun.?
Leave a Reply Cancel reply
Your email address will not be published. Required fields are marked *
This site uses Akismet to reduce spam. Learn how your comment data is processed .

Top 10 Ice Experiments for Kids
Explore the wonders of ice through these exciting experiments!
We’ve selected the best, fascinating ice-related science experiments designed to awaken your inner scientist, even on the coldest days! These hands-on, educational activities promise not only to improve your understanding of ice’s cool attributes but also to spark a love for scientific exploration.
These experiments can be performed in the classroom and are appropriate for students of all ages and scientific proficiency levels.
1. Fishing for Ice Experiment
In this experiment, students will create their ice fishing setup using a piece of yarn or string, and then simulate the process of fishing through the ice.
2. Colorful Melting Ice Ball Patterns
This experiment is a great way to incorporate art and creativity into the science classroom. This experiment can help students develop important scientific skills such as observation, measurement, and data analysis.
By conducting this kind of hands-on experiments, students can gain a deeper understanding of scientific concepts and learn to think like scientists.
3. Ice Excavation
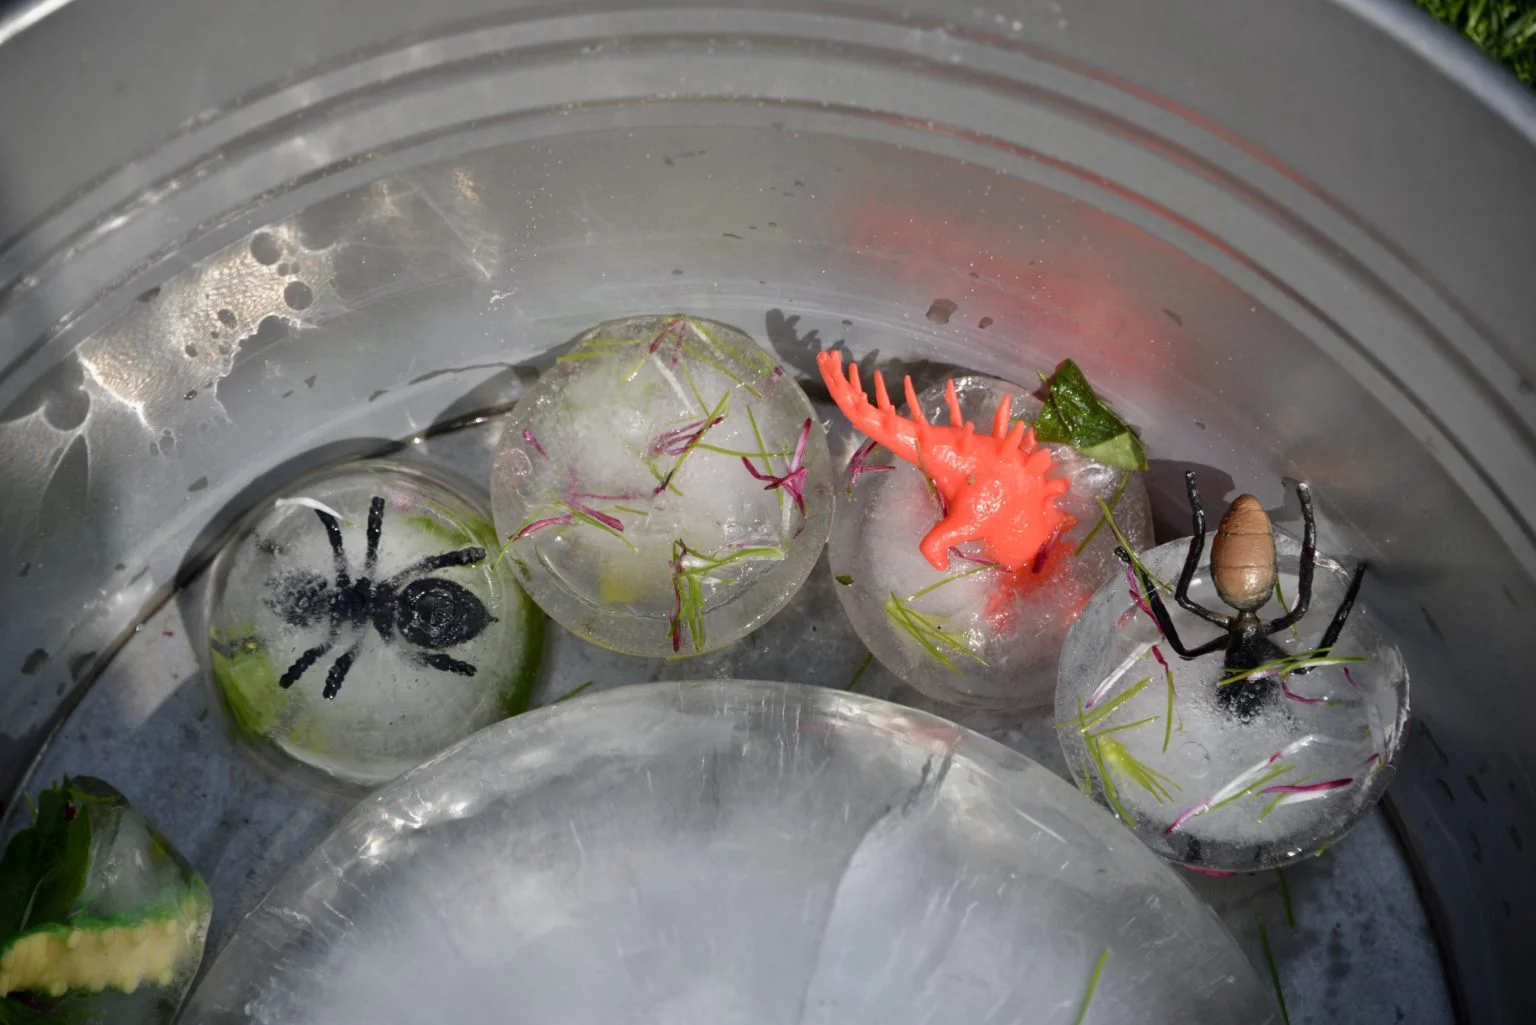
The simple ice excavation experiment is a thrilling and educational activity that may teach children about the characteristics of ice and the concepts of excavation.
Students can investigate the physical characteristics of ice and learn about the methods used by archaeologists and paleontologists to unearth fossils and artifacts by freezing small toys or objects in a block of ice and then excavating them using different tools.
Learn more: Easy Ice Excavation
4. Make an Instant Ice Experiment
Students should try this experiment because it is a fun and engaging way to learn about the science of ice formation and the principles of thermodynamics.
5. Make an Iceberg Experiment
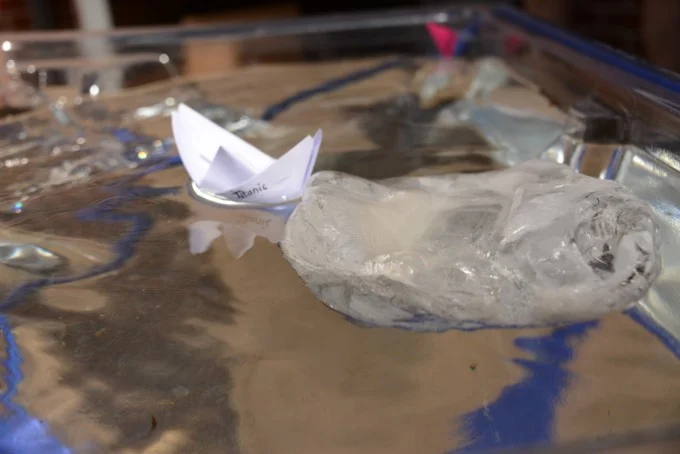
Have you thought about the formation of icebergs and how they impact ship behavior? Students can learn about the characteristics of water, the principles of buoyancy, and the factors that influence iceberg behavior through this exercise.
Learn more: Titanic Science- Make an Iceberg
6. Frost in a Can
Students can develop a stronger appreciation for the natural world and a deeper knowledge of scientific ideas by participating in hands-on activities like the frost in a can experiment.
Frost in a can is a simple but fascinating experiment that demonstrates the science of how frost forms.
7. How to Keep Ice Longer? | Kid Ice Experiment
Have you ever wondered a way to slow down the melting of ice? Students will investigate several methods and supplies in this project that can be used to protect ice from melting too quickly.
8. Glowing Ice Cubes
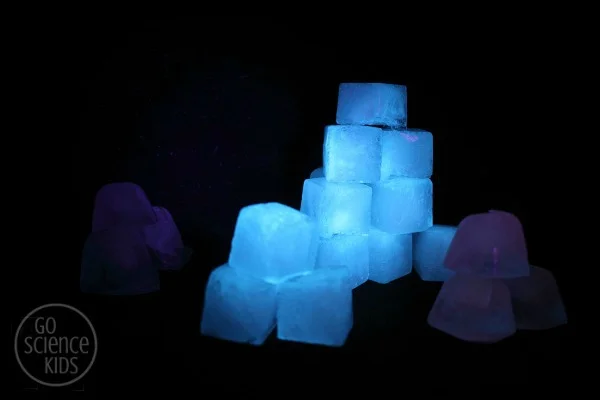
In this experiment, students will create their own glowing ice cubes using tonic water and a black light, and then observe the colorful patterns as they melt.
Learn more: Glowing Ice-Cubes
9. Grow Your Own Spike
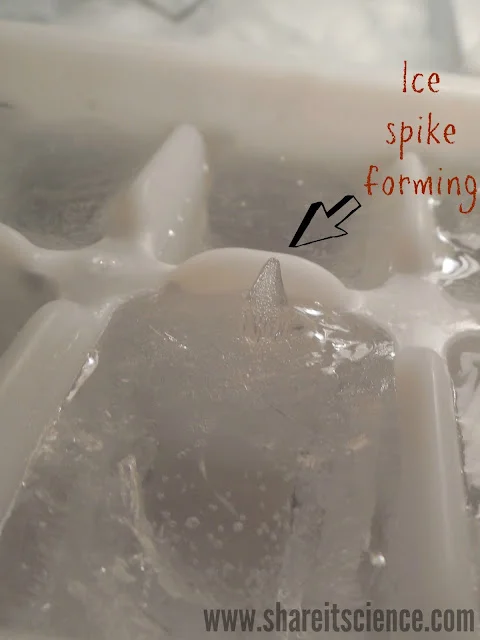
By observing the behavior of the spike and the water, students can gain a deeper understanding of the properties of water.
Students can develop a deeper comprehension of scientific ideas and develop their capacity for scientific thought by engaging in practical experiments like this.
Learn more: Ice Science: Grow Your Own Ice Spikes!
10. Burning Ice
The fascinating and educational burning ice experiment involves lighting a piece of ice on fire. The science of combustion and the characteristics of water can both be introduced to students through the use of this experiment.
It’s important to keep in mind that this experiment can be hazardous and shouldn’t be carried out without the appropriate supervision and safety measures.
Similar Posts:
- 68 Best Chemistry Experiments: Learn About Chemical Reactions
- 37 Water Science Experiments: Fun & Easy
- Top 100 Fine Motor Skills Activities for Toddlers and Preschoolers
Leave a Comment Cancel reply
Save my name and email in this browser for the next time I comment.
Get Your ALL ACCESS Shop Pass here →

What Makes Ice Melt Faster?
What makes ice melt faster? Let’s investigate with simple ice melting experiments that kids of varying ages can enjoy. Learn about lowered freezing points, freezing depression points, and more! We love simple science experiments for kids!
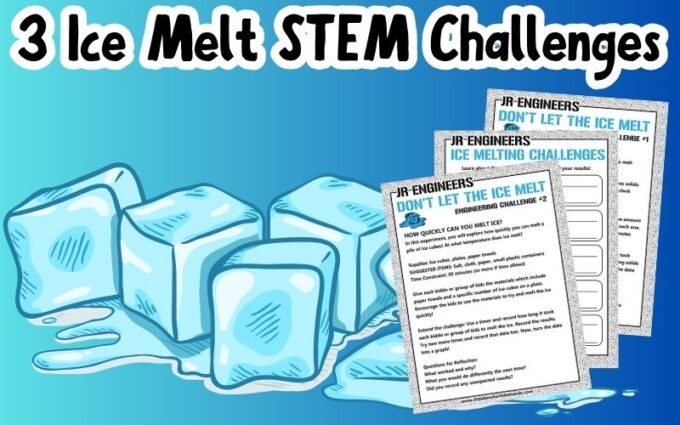
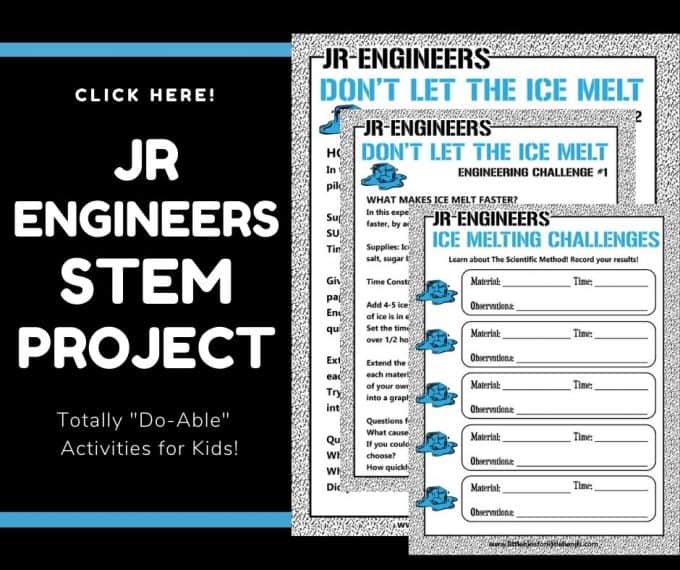
Free Printable Ice Melting Experiment Worksheets!
Let’s get right to learning all about ice. Head to the kitchen, open the freezer and be prepared to experiment with these different ice projects.
Grade Level: Suitable for Kindergarten through 3rd Grade
Project #1: What Makes Ice Melt Faster?
In this experiment, you will investigate what makes ice melt faster, by adding several different solids to your ice. Make sure to use the scientific method and pick variables for this project.
💡 Make ice cream in a bag and homemade slushies to explore the concepts further.
Supplies Needed:
- Muffin tin, jars, or containers
- Various solids. You can start with table salt and sugar, but also include different types of salt, baking soda, sand or dirt etc.
- Stopwatch or clock to determine the time of the experiment

Experiment Set Up:
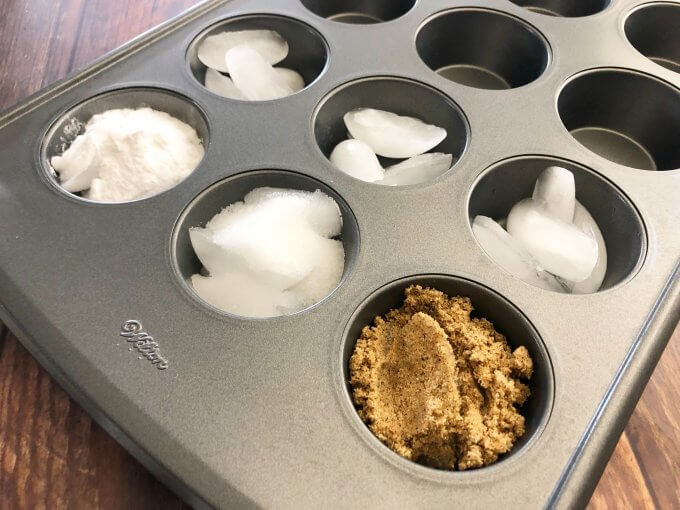
STEP 1: Add 4 to 5 ice cubes to 6 cupcake cups. Make sure the same amount of ice is in each one.
STEP 2: Add 3 tablespoons of each solid to a separate container of ice.
- Add 3 tablespoons of baking soda to cup #1.
- Add 3 tablespoons of salt to cup #2.
- Add 3 tablespoons of sand to cup #3.
Cup #4, cup #5 and cup #6 are your controls and will have nothing added to the ice.
STEP 3: Set the timer to check back on the ice cubes every 10 minutes over 1/2 hour and record your results. Then draw your conclusions.
What did you find caused the ice to melt fastest?
EXTENSION: Use a timer to record how long each material took to melt the ice. Record the results. Try adding solids of your own choice and record that data, too. Now, turn the data into a graph!
Science Explanation: Why Does Salt Melt Ice?
Unsurprisingly, adding salt (sodium chloride or NaCl) made the ice melt fastest. Baking soda was second as it’s a type of salt and can lower the freezing point of water. However, it is a powder. Sand did not do much! So why does salt melt ice?
Salt lowers water’s freezing or melting point. It interferes with ice crystals, and by mixing with the liquid water on the melting ice, it speeds up the melting process. This is also called a lowered freezing point.
💡 Read more about the Freezing Point Depression further below.
Project #2: How Quickly Can Ice Melt?
In this experiment, you will explore how quickly you can melt a pile of ice cubes! At what temperature does ice melt? Read on to learn more!
The challenge is to see how quickly you can melt the ice cubes. This can be done individually or in small groups. If you choose to use the small group format, make sure to allow a few minutes for the kids to brainstorm ideas together.
- Paper towels
- Optional: Table Salt (sodium chloride, NaCl), Cloth, Paper, Small Plastic Food Containers
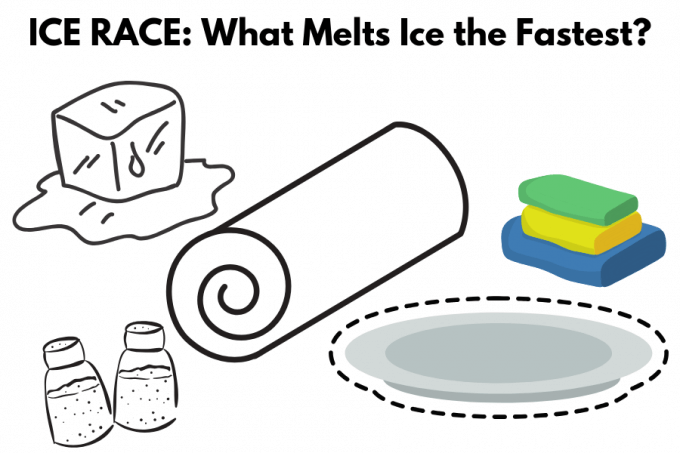
STEP 1: Give each kiddo or group of kids the materials, including paper towels and a specific number of ice cubes on a plate.
STEP 2: Encourage the kids to use the materials to try and melt the ice quickly!
STEP 3: When the race is over (set a specific amount of time that works for you), ask groups to share the steps of their melting process. Discuss what worked and why. Also, discuss what you would do differently the next time!
💡 Use a timer and record how long it took each kiddo or group of kids to melt the ice. Record the results. Try two more times and record that data. Now, turn the data into a graph!
The Science: Freezing Point Depression
Freezing point depression explains why adding something to a liquid, like salt to water, can cause it to freeze at a lower temperature than it usually would (lowered freezing point).
Here’s an example to help you understand: Think about plain water. It freezes and turns into ice at 32°F (0°C). But if you add salt (sodium chloride) to the water, the freezing point drops. The water now has to be even colder than 32°F to freeze! This is why salt is often spread on icy roads in winter – it helps melt the ice by lowering the water’s freezing point.
💡 The salt and water, when mixed, become a chemical solution !
In simple terms, adding certain substances (like salt) to a liquid makes it harder for that liquid to freeze! Ice at the freezing point of water has less energy or heat than water at the same temperature!
💡 Learn more about the freezing point of water with our freezing water experiment .
More Ways to Melt Ice Cubes
There are many possible ways to melt ice. The simplest way is just to leave the ice to melt at room temperature. The heat energy in the warmer room works to break up the ice structure to turn it to water. We see this all the time with the ice cubes in our drink glasses or if we accidentally leave one out on the counter.
You could hold the ice cube in your hand (brrr, chilly) to speed up the melting process since your body is usually warmer than the room. To make it melt even faster this way, try rubbing your hands together really fast before holding the ice cube. Rubbing your hands together quickly creates friction, which adds more heat through an increased temperature!
Another way to generate more heat and a higher temperature is to rub the ice cube on a piece of cloth.
How about placing the ice cube on a dark piece of cloth or paper and placing it in sunlight? Dark colors retain heat from sunlight better than light colors, so you might feel hotter wearing a dark T-shirt in the middle of a hot summer day!
💡 See our what colors absorb heat best experiment.
Project #3: How Do You Keep Ice From Melting?
In this third experiment, you will investigate how to keep ice from melting. Instead of seeing how fast ice melts, let’s try to keep it cool instead!
The challenge is to see how slowly you can keep the ice from melting by reducing the amount of heat or energy that surrounds the ice. This can also be done individually or in small groups. Remember, if you do choose to use the small group format, make sure to allow for time for the kids to brainstorm ideas together.
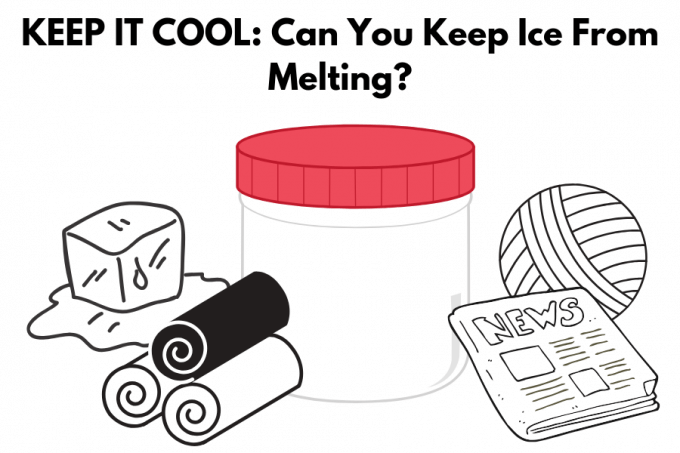
- Small zip-top bags
- Small plastic containers (as close to the same size as possible so they are uniform)
- Various materials (eg Aluminum foil, cotton balls, paper towels, rubber bands)
💡 There are quite a few items that can be potentially used for this ice cube insulation challenge! Check out the recycling bin, junk drawer, garage, and more. This is also where our dollar store engineering kit comes in handy. You can use the items you have available for a budget-friendly STEM challenge.
STEP 1: Brainstorm. What are the best materials available to keep the ice from melting?
STEP 2: Decide what materials or combination of materials you want to use to keep your ice cubes from melting by insulating them! Create one or more insulated containers to test your ideas. You can choose a specific amount of time for this portion of the project or split the STEM challenge up over several days.
STEP 3: When all the insulated containers are finished, place an ice cube in a small zip-top plastic bag and then place it in the insulated container. Make sure to put the lids on!
💡 As a control , you will want to place a zip-top bag, with an ice cube into it, in a similar container that is not insulated. This control container is for comparison. By creating a control, you make it possible to determine whether the materials (variables) you chose are responsible for the outcome!
STEP 4: Place all the containers in a cool dry place away from a heat source or direct sunlight. No extra energy is needed here!
STEP 5: Check your containers every 10 minutes. Notice any differences Record your observations until all of the ice is completely melted. Make sure you do not handle the ice or remove the ice from the container while you make your observations.
STEP 6: Think about what materials worked best and why. How can you improve your results?
Science Explanation: How Insulation Works
Everyone knows that when you remove ice from the freezer, it will melt over time. However, most of us don’t think about why it happens. The air around the ice cubes is usually warmer than the ice and it causes the ice (solid) to change into water (liquid). States of matter too!
So, if you do not want the ice to melt, you need to keep the warm air (heat energy) away from the ice by using an insulating material. Some great insulators just for a hint are felt, newspaper, and wool. Insulation prevents the transfer of heat to the ice so the ice crystals stay icy and cold longer.
Insulation is also used to keep our houses warm in the winter in cold parts of the world by keeping the cold out! Additionally, insulation can keep the heat out of a house on a hot day too! Insulation can keep up comfortably when the temperature drops and when it rises!
💡 Learn more about insulation with this insulation experiment !
Printable Science Projects For Kids
If you’re looking to grab all of our printable science projects in one convenient place plus exclusive worksheets and bonuses like a STEAM Project pack, our Science Project Pack is what you need! Over 300+ Pages!
- Bonus Quick Grab Packs for Biology, Earth Science, Chemistry, and Physics
- 90+ classic science activities with journal pages, supply lists, set up and process, and science information. NEW! Activity-specific observation pages!
- Best science practices posters and our original science method process folders for extra alternatives!
- Be a Collector activities pack introduces kids to the world of making collections through the eyes of a scientist. What will they collect first?
- Know the Words Science vocabulary pack includes flashcards, crosswords, and word searches that illuminate keywords in the experiments!
- My science journal writing prompts explore what it means to be a scientist!
- Bonus STEAM Project Pack: Art meets science with doable projects!
- Pingback: 40+ Creative & Easy Ways to Play with Ice - HAPPY TODDLER PLAYTIME
I love your stuff! but why is it so wordy….taakes a lot of ink to print out even the simple stuff….just give list of ingredients……about 15 great ideas but didn’t print out one becasuse they were all 8 to 12 pages long
HI, an article like this is not meant to be printed which is why it’s not helpful to you. Our shop offers paid packs for download though.
Comments are closed.

Subscribe to receive a free 5-Day STEM Challenge Guide
~ projects to try now ~.

- Science, Tech, Math ›
- Chemistry ›
- Activities for Kids ›
Melting Ice Science Experiment
Jose A. Bernat Bacete / Getty Images
- Activities for Kids
- Chemical Laws
- Periodic Table
- Projects & Experiments
- Scientific Method
- Biochemistry
- Physical Chemistry
- Medical Chemistry
- Chemistry In Everyday Life
- Famous Chemists
- Abbreviations & Acronyms
- Weather & Climate
- Ph.D., Biomedical Sciences, University of Tennessee at Knoxville
- B.A., Physics and Mathematics, Hastings College
This is a fun, non-toxic project for kids of all ages, and the best part is you likely have everything you need at home. All you need is ice, salt, and food coloring.
You can use any type of salt for this project. Coarse salt, such as rock salt or sea salt , works great. Table salt is fine. Also, you could use other types of salt besides sodium chloride (NaCl). For example, Epsom salts are a good choice.
You don't have to color the project, but it's a lot of fun to use food coloring, watercolors, or any water-based paint. You can use liquids or powders, whichever you have handy.
- Food coloring (or watercolors or tempera paints)
Experiment Instructions
- Make ice. You can use ice cubes for this project, but it's nice to have larger pieces of ice for your experiment. Freeze water in shallow plastic containers such as disposable storage containers for sandwiches or leftovers. Only fill the containers part way to make relatively thin pieces of ice. The salt can melt holes all the way through thin pieces, making interesting ice tunnels.
- Keep the ice in the freezer until you are ready to experiment, then remove the blocks of ice and place them on a cookie sheet or in a shallow pan. If the ice doesn't want to come out, it's easy to remove ice from containers by running warm water around the bottom of the dish. Place the pieces of ice in a large pan or a cookie sheet. The ice will melt, so this keeps the project contained.
- Sprinkle salt onto the ice or make little salt piles on top of the pieces. Experiment.
- Dot the surface with coloring. The coloring doesn't color the frozen ice, but it follows the melting pattern . You'll be able to see channels, holes, and tunnels in the ice, plus it looks pretty.
- You can add more salt and coloring, or not. Explore however you like.
Clean Up Tips
This is a messy project. You can perform it outdoors or in a kitchen or bathroom. The coloring will stain hands, clothes, and surfaces. You can remove coloring from counters using a cleaner with bleach.
How It Works
Very young kids will like to explore and may not care too much about the science, but you can discuss erosion and the shapes formed by running water. The salt lowers the freezing point of water through a process called freezing point depression . The ice starts to melt, making liquid water. Salt dissolves in the water, adding ions that increase the temperature at which the water could re-freeze. As the ice melts, energy is drawn from the water, making it colder. Salt is used in ice cream makers for this reason. It makes the ice cream cold enough to freeze. Did you notice how the water feels colder than the ice cube? The ice exposed to the salty water melts faster than other ice, so holes and channels form.
- Kitchen Science Experiments for Kids
- Safe Science Experiments
- Science Projects Photo Gallery
- Easy Chemistry Experiments to Do at Home
- Mad Scientist Party Theme
- Homemade Iceberg Experiment
- Grade School Science Fair Project Ideas
- Middle School Science Experiments
- Easy Science Projects
- Mentos and Soda Project
- Bottle Balloon Blow-Up Experiment
- Top Chemistry Projects for Bored Kids
- Fried Green Egg Food Science Project
- Science Experiments and Activities for Preschoolers
- Fluorescent Light Science Experiment
- Simple Water Science Magic Tricks

IMAGES
VIDEO
COMMENTS
Sticky Ice Science Experiment. Little magical experiment for 3-8 grades children challenging to lift an ice cube using only two ingredients! Kids can challenge their friends to get the ice out of the bowl without getting their hands wet. Keeps children engaged and entertaining for hours!
Try your hand at creating fast melting ice by using information about freezing point depression to predict which substances, when mixed with water and frozen, will make ice melt the quickest. ... Investigate the effect of temperature on how colligative properties melt the ice cubes. To do this, try your experiment at different temperatures ...
Creative ice experiments. The Artful Parent has a beautiful melting ice, salt and watercolour experiment. Freeze small plastic fish inside an ice cube and try some ice fishing! This is a lovely preschool science activity where children discover how water temperature impacts how fast the ice melts.
This science experiment was inspired by the classic experiment where you fill a jar with snow, let it melt, and then compare the volume of water to the original volume of snow. It's amazing how much LESS space the water takes up! However, some of us don't have snow. Like, almost ever. So here's a way to do a similar experiment with ice!
How the Instant Ice Science Experiment Works. This simple but amazing instant ice science experiment is more than just a cool one (see what I did there?). The science behind this experiment lies in the freezing temperature of water and how ice crystals form. This experiment is sometimes referred to as Supercooled Water or Flash Freezing.
Make an Instant Ice Experiment. Students should try this experiment because it is a fun and engaging way to learn about the science of ice formation and the principles of thermodynamics. 5. Make an Iceberg Experiment. Have you thought about the formation of icebergs and how they impact ship behavior? Students can learn about the characteristics ...
Experiment Set Up: STEP 1: Give each kiddo or group of kids the materials, including paper towels and a specific number of ice cubes on a plate. STEP 2: Encourage the kids to use the materials to try and melt the ice quickly! STEP 3: When the race is over (set a specific amount of time that works for you), ask groups to share the steps of their melting process.
Today you will see 5 simple Ice science Experiments to do at home. You can do the following easy winter experiments with your kids at home or preschool:1. Ma...
Keep the ice in the freezer until you are ready to experiment, then remove the blocks of ice and place them on a cookie sheet or in a shallow pan. If the ice doesn't want to come out, it's easy to remove ice from containers by running warm water around the bottom of the dish.
Kids don't have to live in a cold climate to be fascinated with ice. In fact, the hot days of summer make most of us crave ice! In the following science experiments, kids can watch ice molecules interact with water molecules, try their hand as insulating an ice cube, and learn how salt works together with ice as homeschool students lift an ice cube with a piece of string and then make ice cream.